
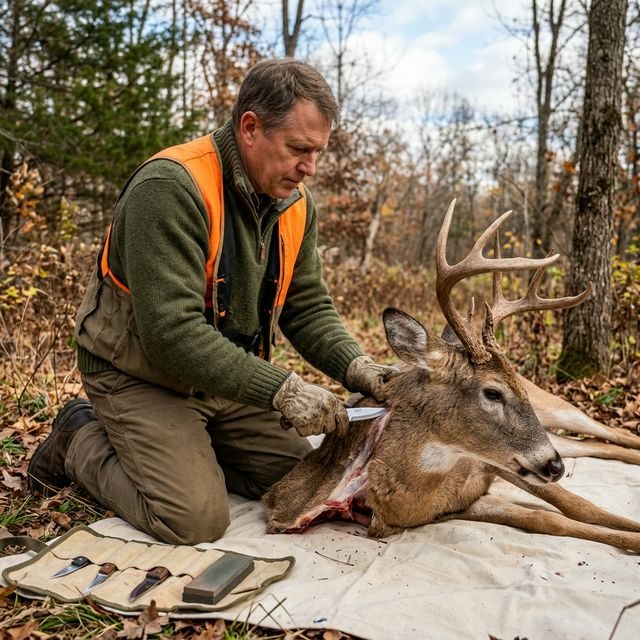
Field Caping a Buck: The Ultimate Preparation for the Taxidermist
Don't short-cape a trophy buck. Use the rule of threes, safe face cuts, and cooling steps so your taxidermist can build a clean, lasting shoulder mount.
After years on one buck, the worst ending is a ruined cape. Taxidermists say the same thing every season: hunters short-cape animals because they underestimate how much hide a pedestal or semi-sneak mount needs to stretch over a foam manikin.
Field caping is hide preservation with a knife—not a race to lighten the drag. Cut wrong in the dirt and no studio magic hides the stitches. If you only want bone on the wall, consider a European mount instead and skip the shoulder cape entirely. For meat handling, keep a ready kill kit and sharp processing knives. When the mount is on the wall, pose choices matter too—see taxidermy poses for whitetail mounts before you drop off the cape.
Decide Mount Type Before You Cut
Talk to your taxidermist—or decide clearly—before the first incision:
- Shoulder mount / pedestal / sneak — needs hide well behind the shoulders
- Euro skull mount — cape optional; focus on skull care
- Rug or full body — special instructions; do not improvise
When in doubt, leave extra hide. Taxidermists can trim. They cannot invent missing skin. A phone photo of the buck on the ground with a tape measure behind the shoulder gives your taxidermist something to reference if you are unsure where to cut.
The Rule of Threes: Enough Hide for Modern Poses
Short-cape mistakes happen at the neck. For any mount that shows chest and shoulder, you need more leather than feels intuitive.
Midsection “hula hoop” cut
Make a continuous circular cut around the body 6–8 inches behind the front shoulders—roughly mid-rib on a mature buck. Not at the base of the neck. Not at the shoulder crease.
Front leg tubes
- Circle each front leg just below the “knee” (wrist) joint.
- Cut up the back of the leg—where brown meets white—into the armpit.
- That rear seam hides against the wall or in the crease on the finished mount. Avoid cutting up the front or outside of the leg.
Tube the hide forward
Work the skin forward over shoulders toward the head like turning a sock inside out. Keep flesh on the cape side trimmed of heavy meat, but do not skin the face yet unless you are trained.
Preserving the Face: Stop Early
Eyes, tear ducts, and lips are thin and unforgiving.
Preferred method for most hunters
Tube the neck hide to the ears, then saw the head off at the atlas joint, leaving skull and face skin attached for the taxidermist. Hand them a full cape with the head in it. They will detail eyelids and lips under good light with proper tools.
Y-cut only when you must
If pack-out forces skull removal:
- Incisions from behind each antler meet in a short Y on the back of the skull.
- Run a cut down the back of the neck.
- Work carefully; leave plenty of skin around eyes and mouth—do not trim close to the lids.
If you are not practiced, do not freehand the tear ducts in leaves and blood. One slip shows forever.
Step-by-Step Field Sequence
- Tag and photo as required by law.
- Field dress for meat cooling if the cape will stay on during the drag—or cape first if heat is extreme; see field dressing.
- Make the mid-rib hoop cut.
- Tube front legs with rear-edge seams.
- Work hide to the head; sever neck or leave whole per plan.
- Remove excess meat from the cape flesh side without nicking hair roots.
- Cool immediately.
Keep knives razor sharp—dull blades tear more than they cut. A small fleshing knife and bone saw belong in the trophy kit alongside your gutting blade.
Protecting Antlers During Caping
Velvet or hard antlers chip easily against rocks and ATV racks. Wrap bases with a soft game bag or towel before dragging. When sawing the skull, support the rack so tines do not snap against a log. Broken tines can sometimes be repaired, but prevention is cheaper than studio fixes.
If blood mats the burrs, rinse gently—not with high-pressure hose that drives fluid into the hair you need for the mount.
Cooling: Stopping Hair Slippage
Heat and moisture are the cape’s enemies. Bacteria attack hair follicles and cause hair slippage—fist-sized patches sliding off in the tanning drum. In ~70°F early seasons, slippage risk climbs within roughly 4 hours if the cape stays warm and wet.
Never do this
- Stuff a warm, bloody cape in a sealed black garbage bag in a hot truck bed
- Leave the cape in direct sun on warm metal
- Drag the buck by the neck behind an ATV (friction breaks hollow hair)
Do this instead
- Open the cape flesh-side out so heat escapes.
- Lay it on cool concrete or hang it briefly in shade.
- Roll flesh-to-flesh, bag in a breathable game bag, and get it on ice or into a freezer.
- Deliver to the taxidermist ASAP with your pose notes and deposit.
Frozen capes are fine if frozen clean and flat enough to avoid cracking; ask your taxidermist for their preference.
Transport and Pack-Out Options
Long drags damage capes. Options by situation:
- Whole head on, caped body — best for short distances on cold days; protect face and neck from gravel
- Caped head in game bag on pack frame — common for backcountry; keep skull attached until the taxidermist unless instructed otherwise
- Rolled cape in cooler with ice — ideal for warm weather; never let ice melt into a soggy hair side
If you must hang the cape at camp overnight, flesh-side out in cool air beats any sealed plastic. Flies are less damaging than anaerobic bacteria in a tied bag.
Common Field Caping Mistakes
- Neck cut too far forward — the mount cannot hide the seam; shoulder mount becomes impossible
- Front-leg seam on the wrong side — visible on a wall turn or pedestal
- Over-trimming around the eyes — taxidermist cannot rebuild thin eyelid skin
- Leaving heavy meat on the cape — accelerates slip; rough-flesh what you safely can in the field
- Freezing a dirty, unfolded wad — cracks hair and traps blood; cool first, then freeze flat
When you make a mistake, call the taxidermist before you keep cutting. Sometimes a different pose or a partial mount saves the project.
What to Tell the Taxidermist
Bring:
- Preferred turn (left/right), pose, and pedestal vs wall hang
- Harvest date and approximate time before icing
- Any cuts, vehicle damage, or bullet/exit issues on the hide
- Reference photos of the buck alive if you have them
Good communication saves remakes. Write pose notes on paper—blood smears make phone screens hard to read at the shop.
Timeline: From Field to Studio
Most quality shops run 6–12+ month backlogs. Drop the cape or frozen head within 24–48 hours when possible, even if the finish date is next year. Early drop-off lets them assess slip risk and start fleshing before bacteria win.
Pay deposits on time and respond to detail calls about ear position or eye color. Silence does not speed the mount—it delays it.
Frequently Asked Questions
How far behind the shoulders is far enough? 6–8 inches behind the shoulder on most bucks. Extra is safer than short. Mid-rib is a reliable visual.
Can I salt the cape in the field? Some hunters dry-salt after cooling and fleshing. Follow your taxidermist’s method—incorrect salting or folded wet salt packs can cause slip too. Ice and fast delivery beat amateur salting for most DIY hunters.
What if I already cut at the neck? Call the taxidermist immediately. Sometimes a shorter mount or creative pose works; sometimes the shoulder mount is compromised. Honesty early beats surprise later.
Should I cape before or after the drag? In heat, cape and cool fast. In cold weather, many hunters drag whole (careful of shoulders and face) and cape at the truck. Protect the hide from gravel and brush either way.
Do bullet holes ruin a mount? Exit holes on the opposite shoulder are common and patchable. Massive neck exits or knife disasters are harder. Document damage before the studio fleshes.
Can I cape a deer I want to score later? Yes—caping does not prevent scoring if the skull plate or skull stays intact per your scorer’s rules. Tell the taxidermist if official measurement matters so they preserve required points.
Give the taxidermist too much hide, cool it like meat, and leave the face to the pro. That is how a lifetime buck stays on the wall without bald patches and ugly seams.