
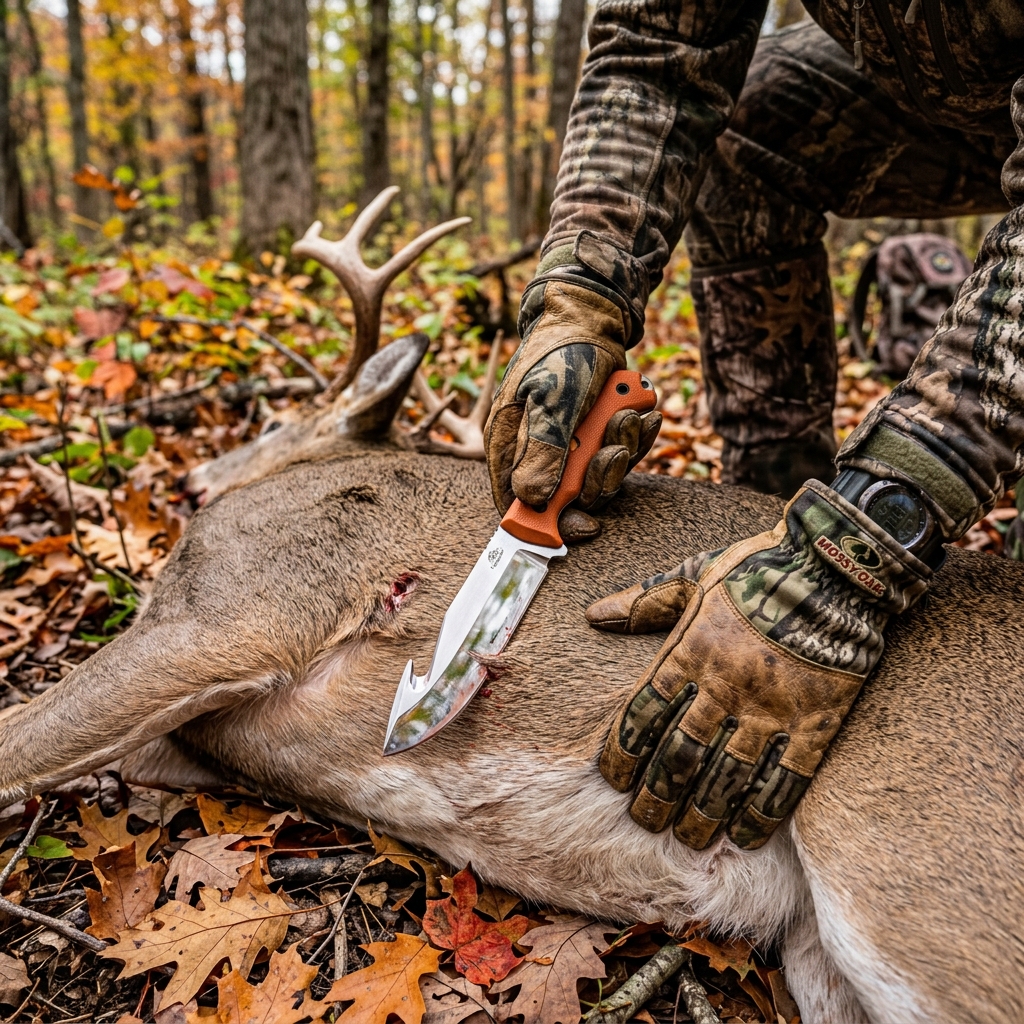
Step-by-Step Field Dressing: Caring for Your Venison in the Field
Cool venison fast with a clear field-dressing sequence: tools, tarsal caution, incision tips, bung care, CWD gloves, and how to avoid bone sour.
The shot was true and the tracking job short. The next hour decides whether you eat great venison or fight sour meat and off-flavors. A deer’s core temperature sits near 101°F. Trapped heat under a winter hide—with guts still inside—breeds bacteria fast. In warm weather, serious spoilage problems like bone sour in the hips can begin in roughly two to three hours if you dawdle. Field dressing is not a chore at the end of the hunt. It is part of the hunt.
Gear to Pack Before You Need It
Build a small dressing kit and leave it in your pack all season:
- Sharp fixed-blade or folding field knife (and a backup)
- Nitrile gloves (multiple pairs)
- Small bone saw or stout snips if you split the pelvis
- Zip bags for heart/liver if you keep organs
- Rope or gambrel gear if you hang to dress
- Wet wipes or water for hands and blade
- Headlamp with fresh batteries
- Tags and required reporting tools
A complete kill kit covers blood trailing and packing out too. Practice opening the kit with gloves on before season.
Cool First: Why Speed Matters
Bacteria love warm, wet protein. Your jobs in order:
- Make the animal safe to approach (unload, tag per law when required)
- Get the guts out
- Prop the cavity open so air reaches the meat
- Move to shade, snow, or a cooler as soon as possible
In temperatures above the 50s°F, treat urgency like a shot clock. Quartering and icing may beat a long drag with the hide on. For spoilage timelines and cooling rules of thumb, read meat spoilage limits.
Step-by-Step Field Dressing Sequence
Methods vary—on the ground vs gambrel, gutless vs traditional. This is a proven traditional sequence for most whitetail hunters:
- Position the deer. Roll onto its back, head uphill if possible. Spread the hind legs.
- Avoid tarsal glands. The dark, musk-heavy patches inside the hocks will ruin flavor if you smear them onto meat or hands. Do not use them as handles.
- Start the belly incision. At the sternum or lower chest, pinch skin, nick carefully, then cut shallowly toward the pelvis. Keep the blade tip up. Two fingers under the knife can bridge the gut wall so you do not puncture intestines.
- Open the body cavity. Extend the cut as needed for access without slicing paunch or bladder.
- Cut the diaphragm. Slice the thin wall separating chest and abdomen along the rib line.
- Remove heart and lungs. Reach forward, sever the windpipe and esophagus as high as you can, and pull the pluck free.
- Free the bung. Circle the anus carefully so the bowel exits cleanly. Many hunters split the pelvis with a saw for a cleaner pull; others tie off and cut with extreme care. Avoid spilling gut contents on meat.
- Roll and drain. Dump the cavity, remove remaining organs, and wipe debris—do not wash with swamp water if you can avoid it.
- Airflow: Prop the chest open with a stick for the drag or hang.
Take photos and celebrate after the cavity is cooling—not before.
Gutless Method and Warm-Weather Shortcuts
In remote country or heat, the gutless method lets you remove quarters and backstraps without opening the gut. You still must cool meat immediately and keep dirty hair/hide off exposed muscle. Choose the method that fits temperature, distance to the truck, and local carcass rules—especially in CWD zones.
CWD and Hygiene Precautions
Wear gloves every time. In Chronic Wasting Disease areas:
- Avoid sawing through backbone or brain when possible
- Follow transport and sampling rules for heads and carcasses
- Sanitize knives that contact CNS tissue per agency guidance (often a strong bleach soak for contaminated tools)
- Do not eat animals that test positive
Full background lives in our CWD guide. When you get home, shift to clean DIY processing surfaces—do not cut steaks on the same board you used for gut work without a full scrub.
Flavor Killers to Avoid
- Smearing tarsal musk on meat
- Puncturing the gut and “washing” the mess into the cavity with dirty water
- Leaving the hide on in 70°F weather for a midday victory lap
- Dragging through mud that packs into the open cavity
- Using a dull knife that slips and causes accidents
Blood in the cavity is normal; dirt, rumen contents, and gland oils are the enemies.
After the Dressing: Drag, Tag, and Chill
- Complete tagging and reporting exactly as required
- Keep the cavity clean on the drag—consider a sled or cart
- Get meat below the danger zone quickly with ice, a walk-in cooler, or cold night air
- Skin sooner rather than later in warm conditions
- Save notes on shot placement for next season’s practice
If you hunt with new partners, walk them through this sequence before anyone is standing over a deer with adrenaline shaking their hands.
Camp Care, Transport, and First-Night Processing
Once the deer is at the truck or camp:
- Prop the cavity open and keep dirt out during loading
- Get the carcass into shade or AC; never leave it in a hot bed under a tonneau for hours
- Skin earlier in warm weather; leaving the hide on can help in hard freezes
- Quarter into breathable game bags if you lack a walk-in cooler
- Keep quarters off each other with airflow—stacked hot meat spoils from the inside out
Home processors should sanitize tables between animals and keep a dedicated gut knife separate from steak knives when possible. If you are new to butchering, freeze bone-in roasts the first year rather than attempting every advanced cut under fatigue—see DIY venison processing. Label packages with date and shot notes so you learn which angles produced the best meat quality.
Aging is optional and temperature-dependent. A controlled cooler near 34–38°F can improve tenderness; a garage that swings to 50°F at afternoon is not an aging chamber. When unsure, butcher sooner and rely on cooking technique.
Finally, dispose of waste legally. Dumping gut piles on a neighbor’s oak flat or in a creek is poor ethics and sometimes illegal. In CWD country, follow specified disposal rules for heads and spines. Good field dressing is the first chapter of good stewardship.
Troubleshooting Messy Moments
Punctured gut: Scoop out solids, wipe with clean paper towels or rinse carefully with clean water, then dry and cool fast. Trim contaminated meat later at home rather than giving up on the whole deer.
Bladder spill: Same idea—wipe, trim if needed, keep cooling. Urine on a small area is not the end of the world if you respond quickly.
Dark musk from tarsals on your gloves: Change gloves before touching edible meat. If musk hit a quarter, trim generously.
Warm afternoon recovery: Prioritize getting the hide off and ice on. A cheaper hotel ice machine run or bags of ice from a gas station beats prideful “we’ll skin at camp tonight” delays.
Night dressing: Headlamp on a helmet or headband beats holding a light in your teeth. Keep spare batteries in the kill kit. Move slowly—most knife accidents happen when people rush in the dark.
Practice scenarios in your mind on the drive so the real moment feels familiar. Confidence here is as important as confidence on the trigger. If you mentor a new hunter, let them watch one full dressing before they take the knife—narrate each cut, especially around the bung and tarsals. That single shared rep prevents most first-deer meat disasters and keeps the celebration focused on the animal, not on panic.
Frequently Asked Questions
How soon should I field dress a deer?
As soon as you can do it safely. In cool weather you have more margin; in warm weather start within minutes of recovering the animal.
Should I rinse the cavity with water?
If the gut was punctured, carefully remove debris. Clean water can help; stagnant creek water can hurt. Pat dry and cool fast either way.
Do I have to split the pelvis?
No, but many hunters find it cleaner. Practice on a mentor’s deer before you invent a method over your first buck.
Can I leave the hide on overnight?
In cold weather, yes—often beneficial. In warm weather, skin and ice sooner. Use temperature, not habit, as the guide.
What organs are safe to keep?
Heart and liver are traditional when the animal is healthy and local advice allows. In CWD areas, follow testing guidance before consuming any part of the deer.